

How To Take Photo Of Moon With Iphone
You see a gorgeous, massive moon on the horizon. You pull out your smartphone and tap the button. And what you get is... a golfball? Artist and photographer Moira Ness provides some tips on how to take a photo of the moon that won't disappoint.
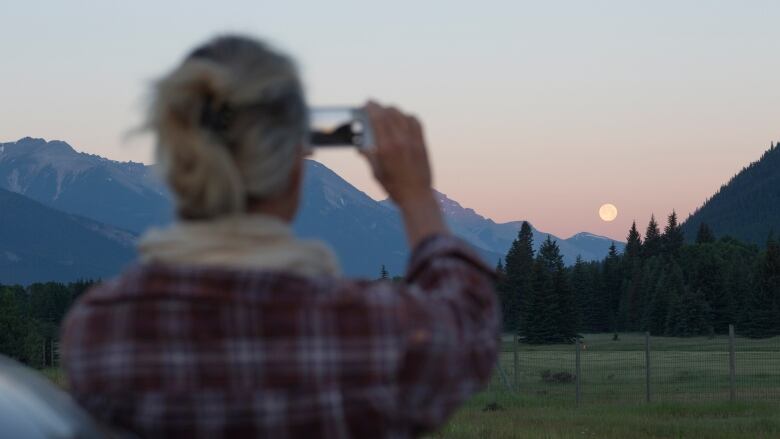
Everybody loves a full moon. And everybody wants to take the perfect picture of one, only to have their phones render something more like a streetlight than the gorgeous sphere in the sky. While National Geographic photos might be the province of experts, I'm quite sure you can take a solid photo of the moon to show your friends and family — and all you need is your smartphone. I'll be straight with you: your smartphone won't capture the stellar photo of a supermoon that an astronomy photographer can get with a professional camera. But you can get creative and take a successful photo of the moon that feels like your own. Your fully-charged smartphone. Be sure to give the lens(es) on the back of your phone a clean with a lint-free cloth before heading out. A tripod for your phone. This could be a fancy store-bought tripod designed to hold your phone — or a DIY tripod made at home. The number one rule in nighttime photography is: always use a tripod! (Without a way to externally stabilize your phone, all photos you take at night will be blurry.) Optional: An app: If you'd like a little more control over your phone's camera settings, download a specialized camera app. This will allow you to manually adjust things like ISO and shutter speed. Yamera, for example, is free and available for both iOS and Android. Pro tip: Save some data bandwidth by downloading any camera app before you leave your home. Extra lens: Purchase a for your smartphone. This isn't required, it's just helpful. A pair of binoculars or a small telescope: This might look weird to people watching you carry surveillance devices at night in their neighbourhood, but try to focus on the fact that you have, in effect, a set of portable zoom lenses. Moonrise is your new best friend! It's the time of night when the moon visibly rises above the horizon. The beginning of the moon's trip across the sky creates something called "moon illusion" — an optical trick that makes the moon appear significantly larger when it first becomes visible in the sky. It is always best to view and photograph a supermoon during moonrise. Learn what time moonrise is where you live (on this handy website). It can also help you to find out what direction the moon will move across the sky, which will further assist you in planning your shot. Keep in mind that if you want the moon at its most visible, you'll also have to wait until it clears the tallest building in the skyline. Where you set up to take your photo plays a huge role in ensuring its success. Maybe you already have a secret moon-viewing spot you plan on visiting. But if you don't, this may help you find the perfect one: Open spaces like parks or parking lots help avoid trees and buildings that can block the horizon line in your photo. Spots that are elevated offer a better view of the horizon (this includes your apartment's rooftop or balcony). Spots like benches and picnic tables are elevated and can help to stabilize your camera and tripod. Of course, make sure you're safe if you're standing on top of something. Shorelines are particularly great! If you live near one that aligns with the moon's path, you are pretty much guaranteed a perfect unobstructed view of the moonrise. If you live in a city, venture to a suburban or rural location with less light pollution for a brighter sky. How to do this: On iPhone: Long press on the area of the screen that frames the moon. A yellow square will appear over the moon with a small sun icon to its right. A yellow rectangle will also appear at the top of your screen that says "AE/AF LOCK." Your phone's exposure is now locked! Place and hold your finger just to the right of the small sun icon and slowly drag downward. The further you drag your finger down, the more the moon will slowly decrease in brightness to a point where you can (hopefully) see some surface detail. You can now remove your finger; the exposure will be locked in. Tap anywhere on the screen to exit the exposure lock. It takes a bit to get used to the controls but this trick can be applied to all photography, both night and day. It works especially well with sunsets! Be sure to practice this a few times before the night of the supermoon. On Android: This is a little bit trickier! Each Android brand has a different native camera app. Do some research into your brand and how to lock its exposure. Some brands even control the lock by long-pressing the shutter button. Now your shot is framed. The moon is exposed properly and the exposure is locked in place. What are you waiting for? It's time! Take the shot! Using your phone's photo timer is always ideal, but if you want the least amount of shakiness, press the shutter button while holding your breath. Remember, you have time to experiment — moonrise lasts a while and you can play around to make the shot feel like your own. Pro tip: Did you bring along those aforementioned binoculars? Set up your shot using steps 1-6. Treat the camera's lens as if it were your eye and place the eyepiece of your telescope or binoculars directly atop the camera's lens. Look at your phone screen and adjust the binocular/telescope until you get the moon in the frame. For the best result, zoom out completely on your phone's camera. One more tip: You can practice this all ahead of time if you pretend a bright overhead outdoor light is actually the moon. There you have it! You now know the basic rules and tricks to take a solid crack at shooting April's supermoon (April 26, 2021). If the clouds block the moon this month or you don't have the time to take photos, don't fret! There is an even better supermoon happening at the end of May (May 26, 2021). It coincides with a lunar eclipse, so West Coast Canadian residents have the special opportunity to view the May supermoon as a blood supermoon. (Don't be scared – this just means it will have slight reddish tones.) Stay COVID-19-safe when you are shooting: distance yourself from other photographers and pedestrians. And don't forget — look at the moon with your own eyes! Don't get so lost in your camera lens that you forget to behold the monumental beauty of astronomy right in front of you. One last thing! Use the hashtag #hellospringcbc when you post your supermoon so everybody can enjoy your newfound skills. Click here for more scenes from spring across the country.Show us your spring with the hashtag #HelloSpringCBC Get started with the equipment you'll need:
Plan your timing and location:
Get the shot:
Go forth and superzoom!
How To Take Photo Of Moon With Iphone
Source: https://www.cbc.ca/life/hellospring/it-s-hard-to-take-a-photo-of-the-moon-here-s-how-to-do-it-better-1.5969920
Posted by: penachem1942.blogspot.com
0 Response to "How To Take Photo Of Moon With Iphone"
Post a Comment